How to resize an image in photoshop
Learn how to resize images like a pro with our comprehensive guide! Discover step-by-step instructions on using Adobe Photoshop to precisely adjust image dimensions and file sizes. Additionally, explore an alternative and user-friendly method using the HIVO Digital Asset Management Platform for hassle-free image resizing. Optimize your visual content for various platforms and devices, delivering a seamless user experience. Enhance your digital presence and captivate your audience with professionally resized images!
How to Resize an Image in Photoshop: A Step-by-Step Guide
Resizing an image is a fundamental skill for anyone working with digital graphics, whether you're a photographer, graphic designer, or a social media enthusiast. Adobe Photoshop is the go-to software for image manipulation, and resizing an image is a breeze with its powerful tools. In this comprehensive guide, we will walk you through the process of resizing an image in Photoshop, step-by-step. Additionally, we'll explore an alternative method using the HIVO Digital Asset Management Platform for hassle-free image resizing.
Resizing an Image in Photoshop
Follow these simple steps to resize an image in Adobe Photoshop:
Step 1: Open Your Image
Launch Adobe Photoshop and open the image you wish to resize by clicking on "File" > "Open" and then selecting your image file.
Step 2: Select the Crop Tool
Click on the Crop Tool in the left toolbar (or press the 'C' key as a shortcut).
Step 3: Set the Desired Size
In the options bar at the top of the screen, enter the desired width and height for your image. Ensure that the "W" (width) and "H" (height) values are in pixels. You can also choose other units like inches or centimeters from the drop-down menu.
Step 4: Choose the Resampling Method
Select the appropriate resampling method from the drop-down menu in the options bar. The default option is usually "Automatic," but you can experiment with other methods like "Bicubic" or "Bilinear" to see which one works best for your image.
Step 5: Resize and Crop
Click and drag on the image to define the area you want to keep after resizing. Adjust the selection as needed to frame your subject properly. To apply the crop and resize, press "Enter" or click the checkmark icon in the options bar.
Step 6: Save Your Resized Image
After cropping and resizing your image, save your work by clicking on "File" > "Save As." Choose a file format (JPEG or PNG are commonly used for web images) and name your resized image. Click "Save" to complete the process.
Using the HIVO Digital Asset Management Platform for Image Resizing
HIVO provides an excellent alternative for image resizing, especially for users who prefer a streamlined and user-friendly approach. Here's how you can resize images using the HIVO platform:
Step 1: Sign In or Create an Account
Visit the HIVO website and sign in to your account. If you don't have one, create a new account to access the platform's features.
Step 2: Upload image and navigate to Asset Detail Page
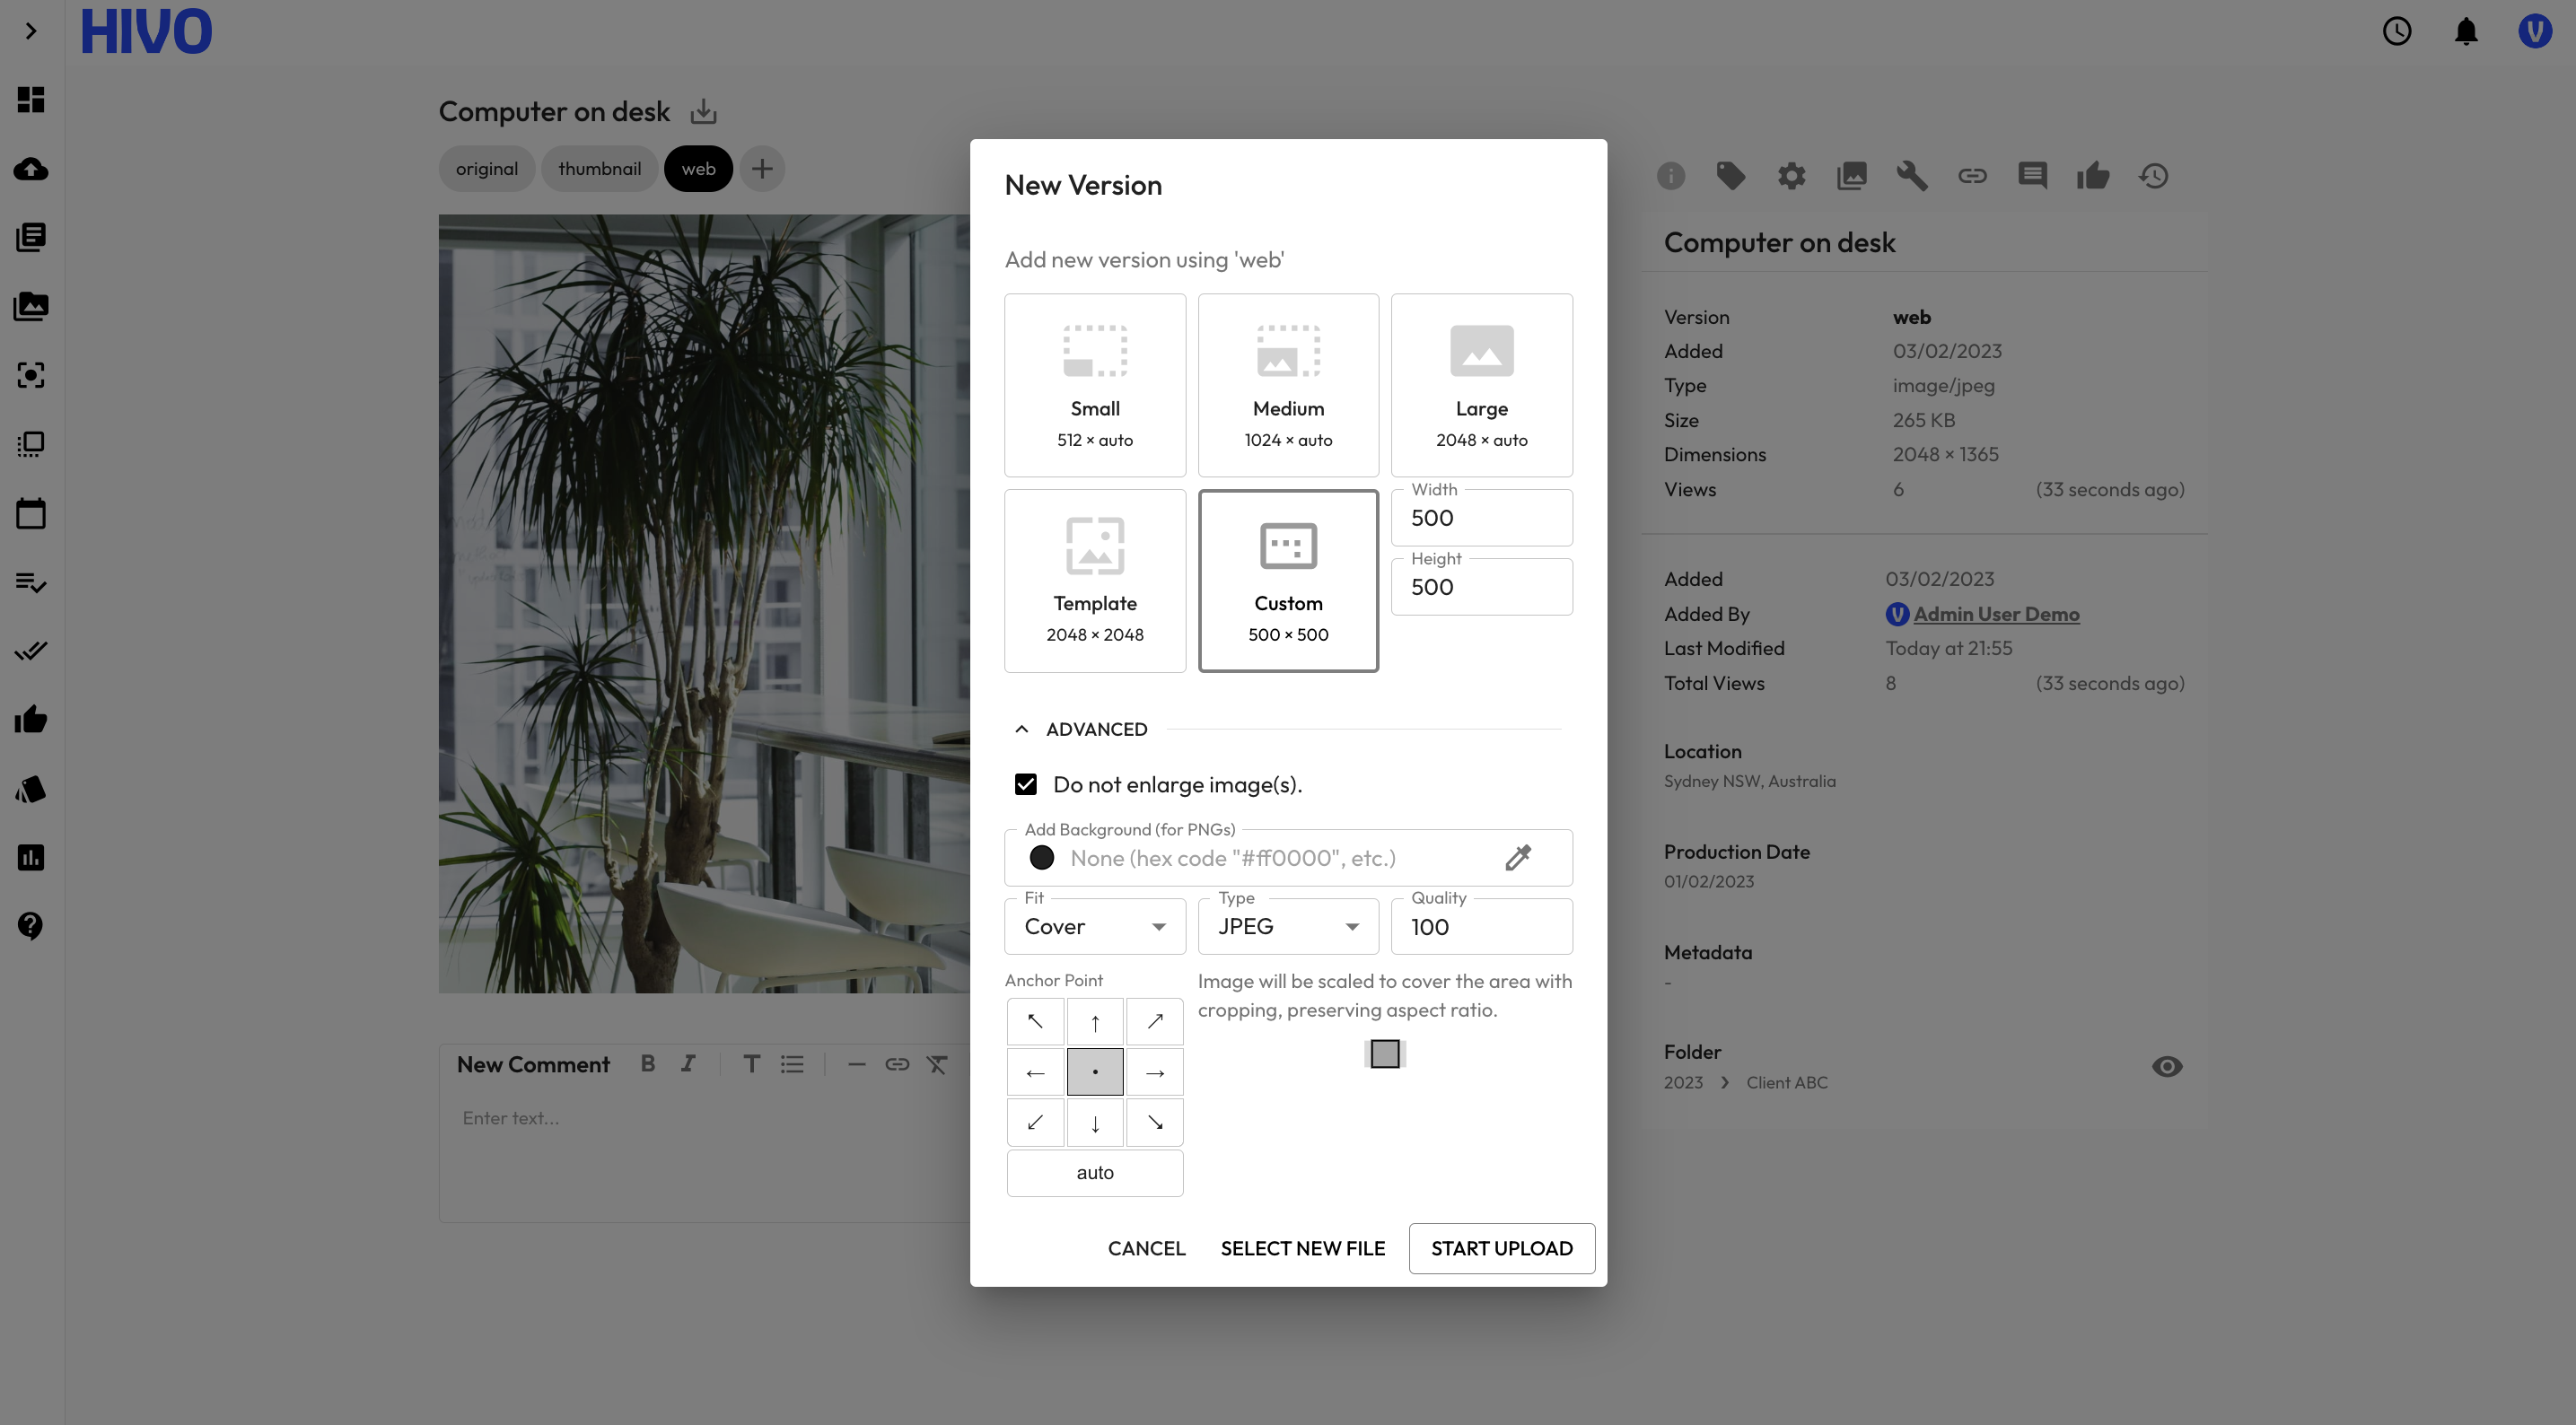
After uploading the images, open the image you wish to resize. Next, click on the "New Version" option, which will open a dialogue box with resizing and file type parameters:

Step 3: Choose the Resizing Option
Once your image is uploaded, select it from the list of uploaded files. Click on the "Resize" option to proceed with the resizing process.
Step 4: Set the New Dimensions
In the resizing dialogue box, enter the desired width and height for your image. You can choose to maintain the aspect ratio to prevent any distortion in the final output.
Step 5: Compression Settings
HIVO allows you to adjust the compression level for your resized image. This feature helps you balance the image quality and file size to suit your specific needs.
Step 6: Preview and Confirm
Before confirming the resizing, use the preview feature to ensure the image appears as you desire. Once you're satisfied with the results, click "Confirm" to proceed with the resizing process.
Step 7: Download the Resized Image
After the resizing process is complete, you can download the resized image to your local device. Your image is now optimized and ready to be used on your website, blog, or social media.
Conclusion
Resizing images is an essential skill for anyone involved in digital content creation. In this guide, we've provided you with a step-by-step tutorial on how to resize an image in Adobe Photoshop, a powerful and versatile image editing software. With Photoshop, you can precisely control the dimensions of your images and make adjustments to suit your specific needs.
Additionally, we explored an alternative method using the HIVO Digital Asset Management Platform for image resizing. HIVO offers a user-friendly interface, making it easy for individuals and businesses to resize images quickly and efficiently. By leveraging HIVO, you can optimize your images for various platforms and devices without the need for advanced image editing skills.
Whether you choose Adobe Photoshop or the HIVO platform for image resizing, having the ability to adjust image dimensions and file sizes is invaluable in the ever-evolving digital landscape. Now that you have these powerful tools at your disposal, you can confidently enhance your visuals and deliver an exceptional user experience across all your digital platforms. Happy resizing!


